What to look for with an ideal green screen setup Welcome,this page is designed to give you information about how to setup a green screen studio for the most effective chroma-key removal. This information is useful if your trying to film or photograph actors or objects and achieve the best possible results. |
1. You will learn how to properly light a green screen. 2. You will learn where your actor or object should be in relation to their distance from the green screen and lighting. 3. You will learn what negative impacts green halos and bad green screen lighting have on your results. |
This tutorial should help you understand the basic concepts behind setting up a useful and effecient green screen filming setup, and a little about how green screen works. There are a few items required to follow along, so lets list those right away. 1. A Green screen. Its important to let you know that you will have to experiment with your own setup, so I won't be telling you what gear to buy, or how many feet you should put this from that. I will tell you what Now lets get into the technical details of how our scene should be setup. To get a clean piece of footage that is easily usable, we will have to take a few more things into consideration before we can key the green screen. First what does that mean to "key the green screen"? The simple way to understand this, is to replace the word key with "clip out" or "Cut out", we will "clip out the green screen" from our image and keep every thing else in the image. Keying out is just a fancy speak used in the computer industry. In more detail it means we are going to use a computer to remove the only the green part of the green screen from our video, which allows us to put a new image or movie only in the part of our movie where the green screen used to be. You can imagine it is like we are having the computer use magic scissors cut out ONLY the green part from each image of our movie. For the green screen to be effective it must be as close to a single color as possible. Perhaps your now thinking what I mean by one color. The whole green screen is one color already you might think. Well that is true in a way, however depending on lighting conditions, that one color can have more variations of itself than desired. The more variations of color, the less efficient and versatile your footage will turn out. Since our green screen footage will have to be edited on a computer, lets try to understand this issue of lighting with an example on the computer. If we only use one light to illuminate the green screen in a computer simulation of our scene, we will create an image like this.. |
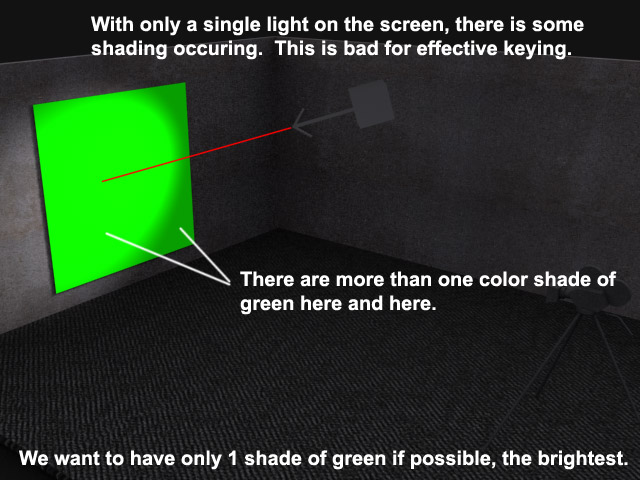
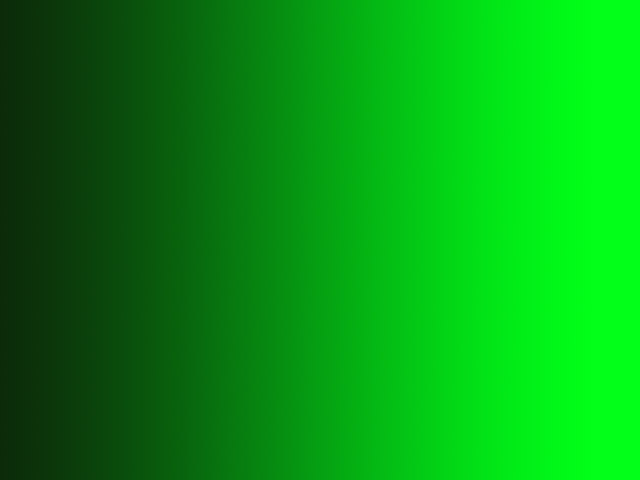
| Notice the color of the green screen is "gradiated" from a darker color green to a Lighter color green depending on where the hotspot of the light is. What is a gradient? |
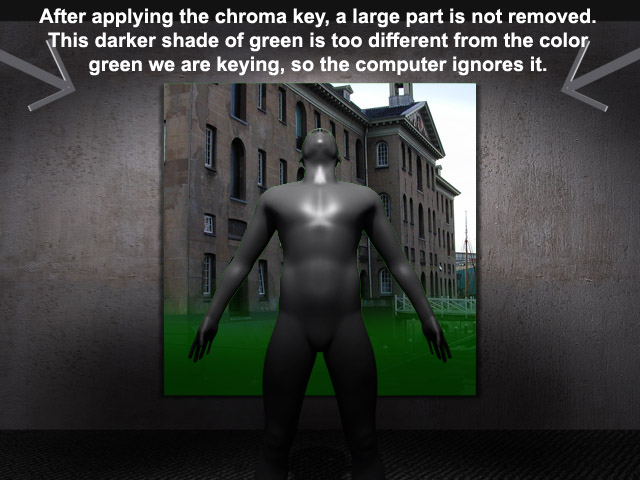
On the right side we have the color green, in the middle a dark green, and on the outside a really dark green. Each of these 3 samples of color from the gradient are considered to be unique, seperate colors. If we tried to key the green screen the computer might not cut out the green part very well. In fact some of the darker colors in the gradient will probably not get cut out leaving strange artifacts behind. The magic wand in photoshop works the same way as chroma keying does, and in photoshop you would set the tolerance for how much your wand grabs a certain color. The tolerance is basically how much from the brightest sample of that color to the darkest sample the wand will select. Now lets look at a different way to light the green screen. Lets use two lights now, and angle them to cross each other on the screen. |
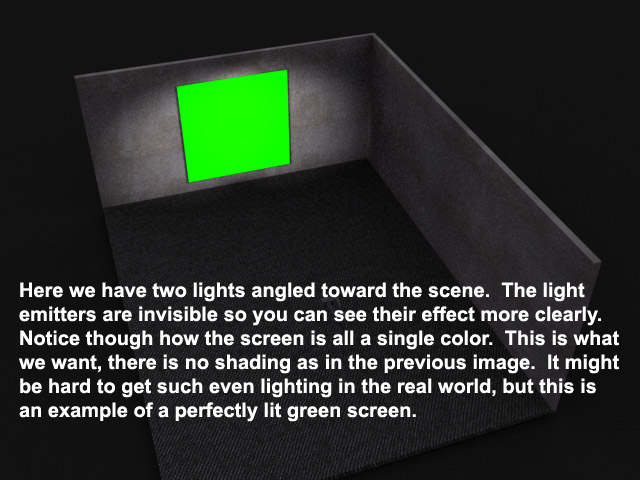
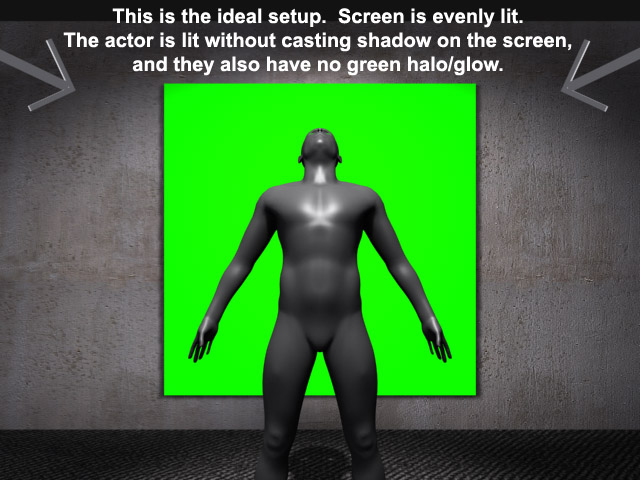
You can see the color of the green screen is now more evenly lit. This means there are less variations of the green color in our footage, and the closer the color is to being the same color, the more efficient the computer will be at cutting it out. If we tried to cut out the green now, it would work pretty well. Now that our screen is properly lit, we need to look at the best way to light our actor or prop effectively. We just have to pay special attention to where our actors or props shadow is being cast, and we need to pay attention to the color of our actors or props. Ideally, you do not want any shadow on your green screen in most cases, unless your shooting a full person on a green screen you can usually avoid it easily. Shooting a full person and getting a believable chroma key is very hard to do in a home studio, and most often this sort of thing is done in a professional studio designed for it. A lot of this has to do with having a very complex light setup. You want your light in your studio to be able to match the light in the real world as close as possible to achieve a realistic blend. Most home studios will not have a complex lighting setup that will allow you to simulate in a studio the same or similar lighting as in your footage. In essence, to really go pro with it, you need a modular, adaptive lighting rig. Most of the time you would by trying to emulate where sunlight might be coming from if you were blending your green screen shots with stock out door footage. This can be very complex, as the sun is always in different positions, and can have different levels of brightness or diffusion based on clouds and environmental factors which affect the sharpness of shadows. These subtle details between how shadows and light directions look in the stock footage and how shadows and light directions are reproduced with your studio lighting is the biggest difference between a professional and most common amatur setups people use. |

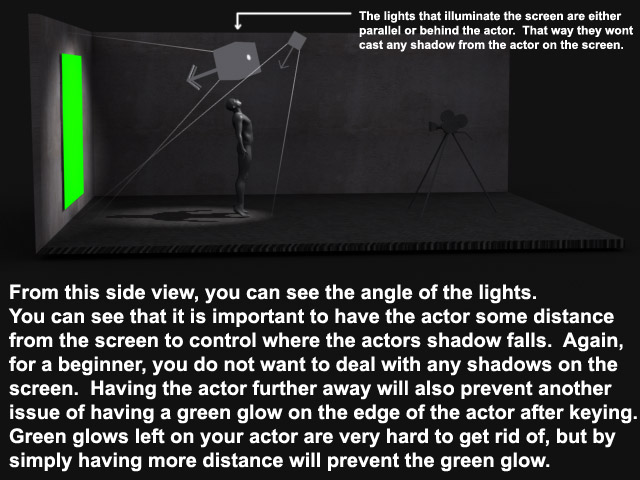
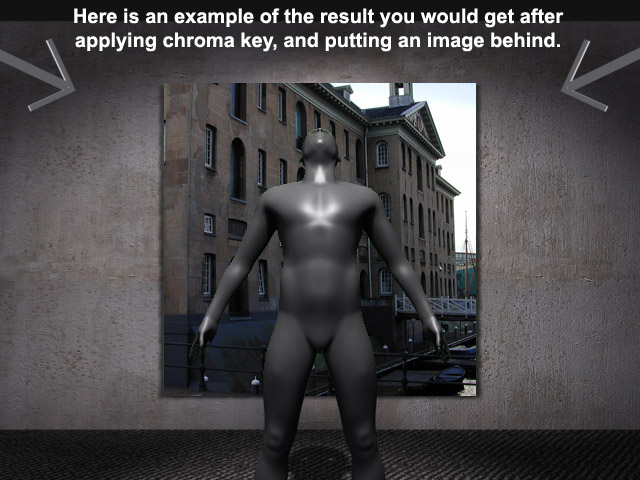
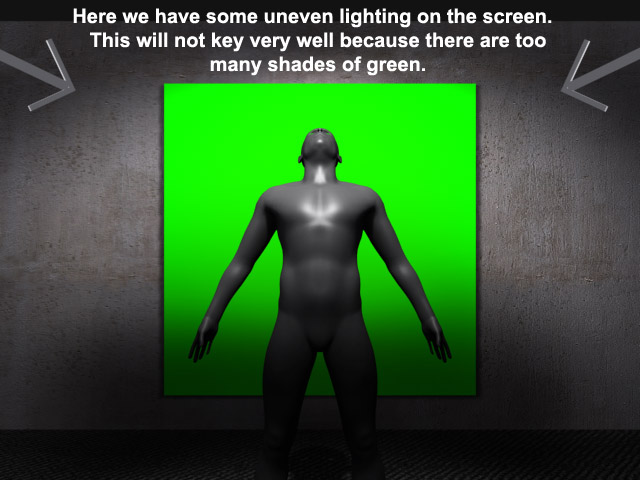
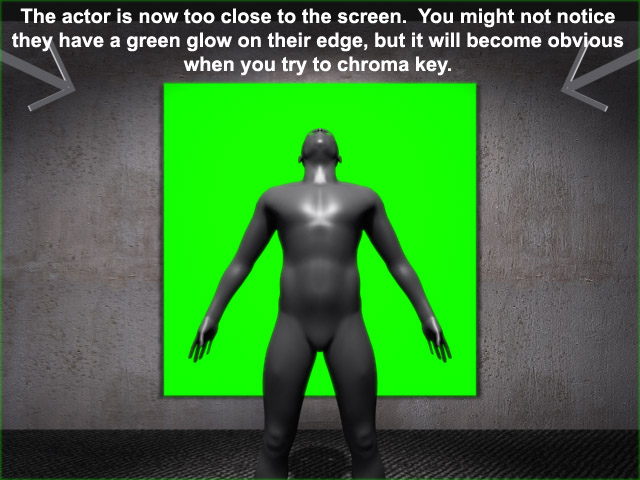
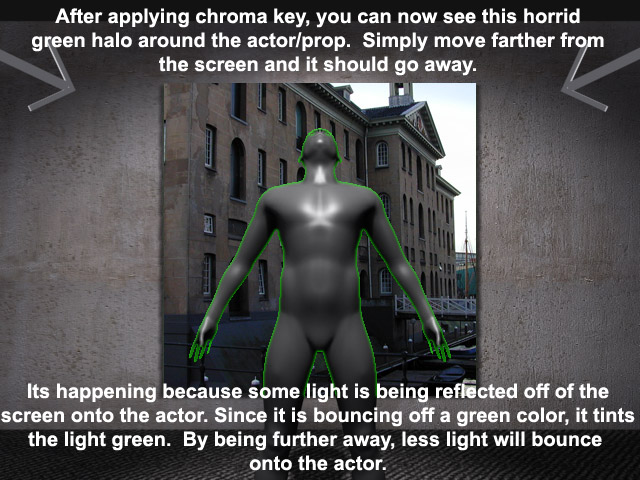
Notice the jagged edges in the result above. Many video software will let you soften the jagged edge a little. In this case the example was made with photoshop, and I did not smooth the edge of the color key selection. Now we will take a look at things to look for in a bad setup. These issues are often overlooked, and it is assumed that the software will just be able to cut out the object if it is simply filmed on green. There are two major issues though. First we will look at how bad lighting can cause gradiation on your green screen and how that will affect your results, and second we will look at having your actors or props being too close to the green screen. If they are too close they might have some light reflected off of the green screen tint them or produce a green halo. |
| Hopefully this guide will help you setup a basic green screen and avoid some of the easy to overlook mistakes. Now figuring out how to accurately emulate the real world light that is occuring in your stock footage to be the same on your actors in the studio is the only thing holding you back from creating movies just like the matrix! |
| Share this page with your friends if you like it! |
|
return to www.themindforest.com
© 2007 -
Jonah Shafer, All Rights Reserved.
( privacy policy )