By jonah Shafer Welcome to a QUICK and EASY tutorial on creating a simple face model for animation in 3ds Max, which includes instruction for creating a slider to animate the face. This should only take between 15 to 30 minutes to complete and is simple enough for even a novice user. |
1. You will learn how to create a very simple non-realistic face model that takes only 2 minutes to make.
2. You will learn how to create a simple morph to animate an expression on the model.
3. You will learn how to create a slider helper, and use it to control the morph animation.
Lets create our simple face outline using the line tool.
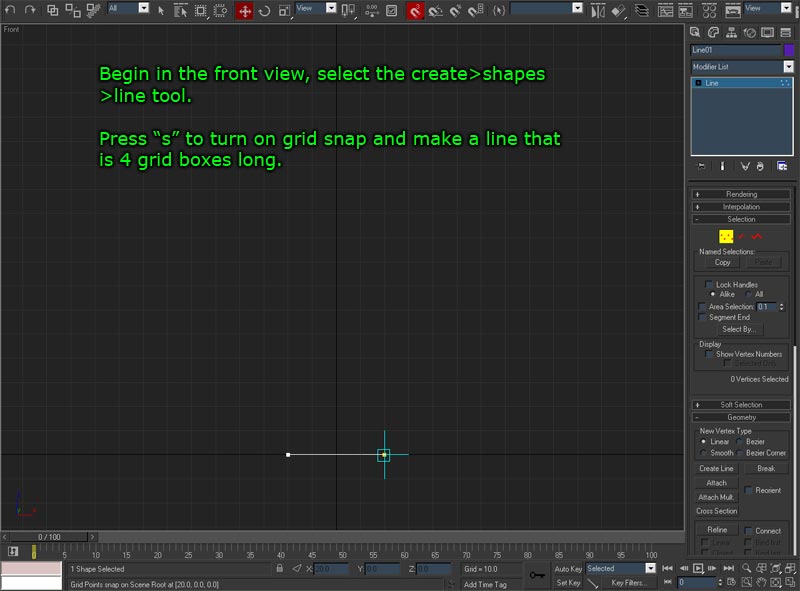
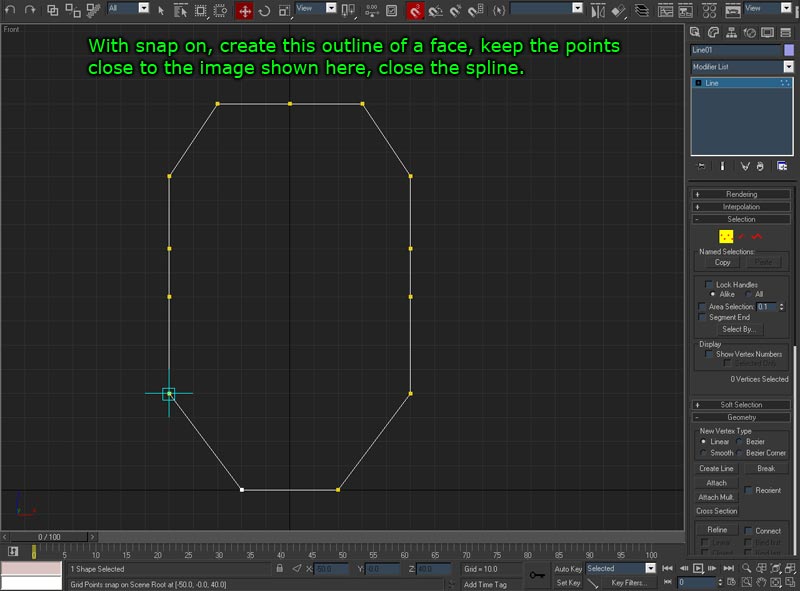
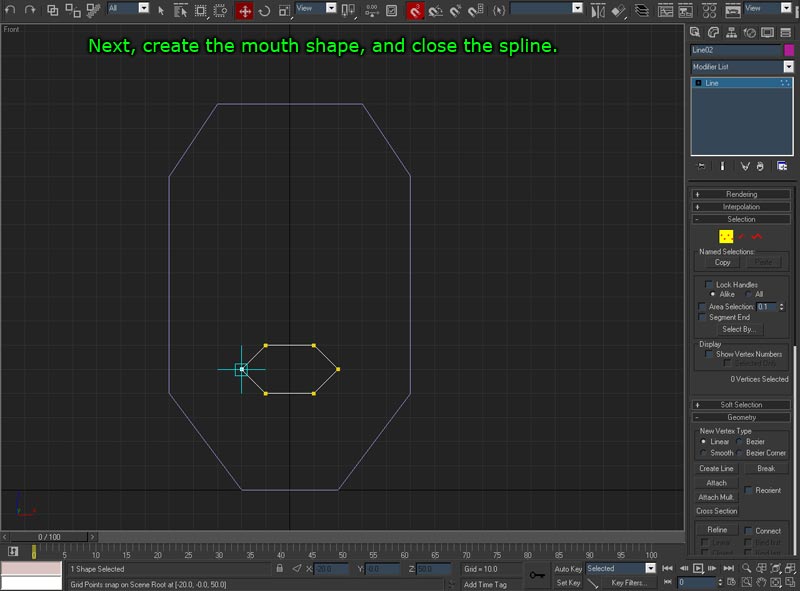
Now we will create a new shape for the mouth which we will be animating..
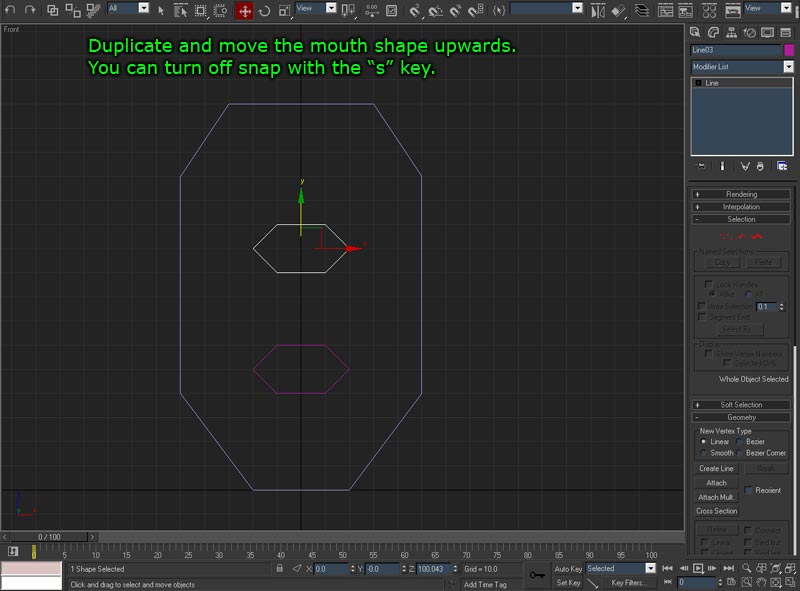
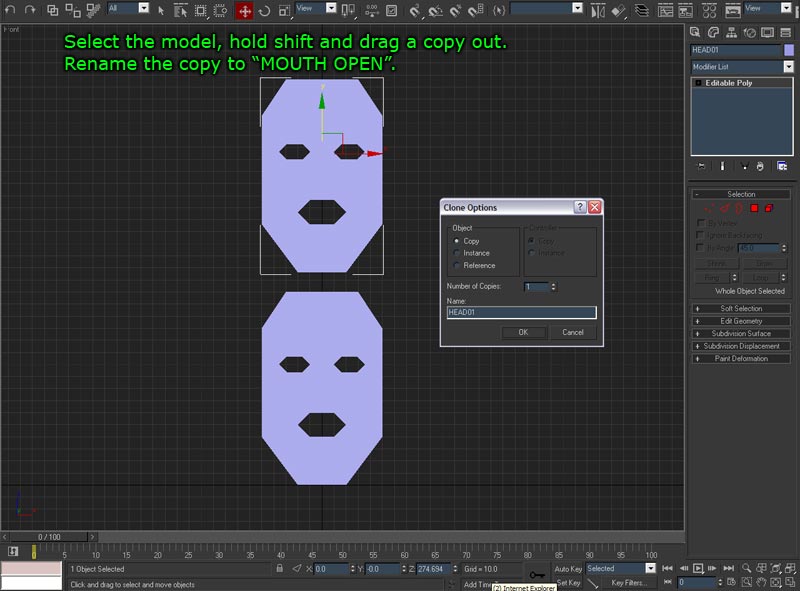
You can duplicate objects, by holding down the shift key and dragging the axis in the direction you want it to move.
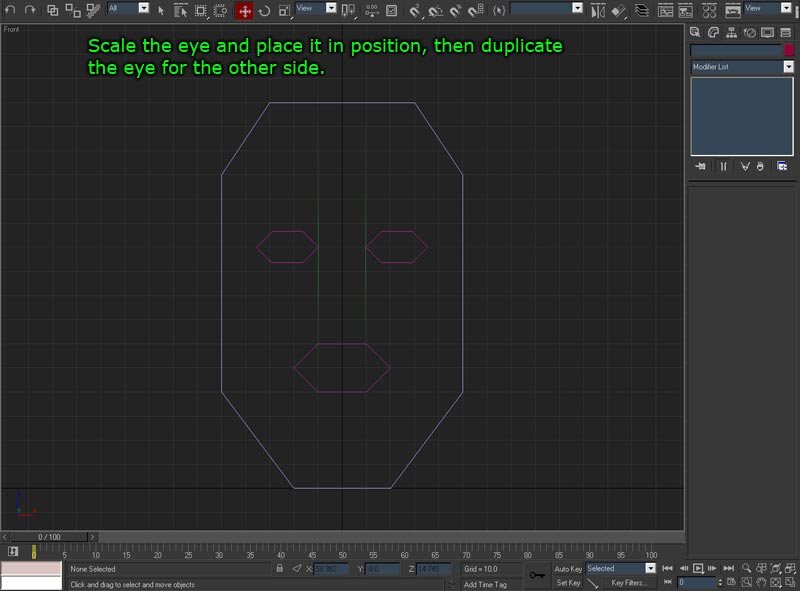
| In order to use the Morpher modifier you cannot affect seperate objects, so we need to attach the objects together and animate them as one object. |
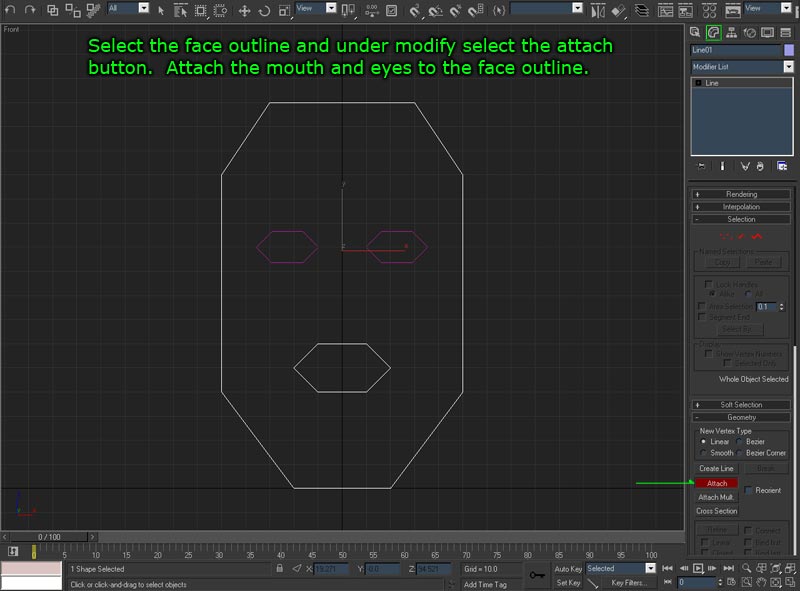
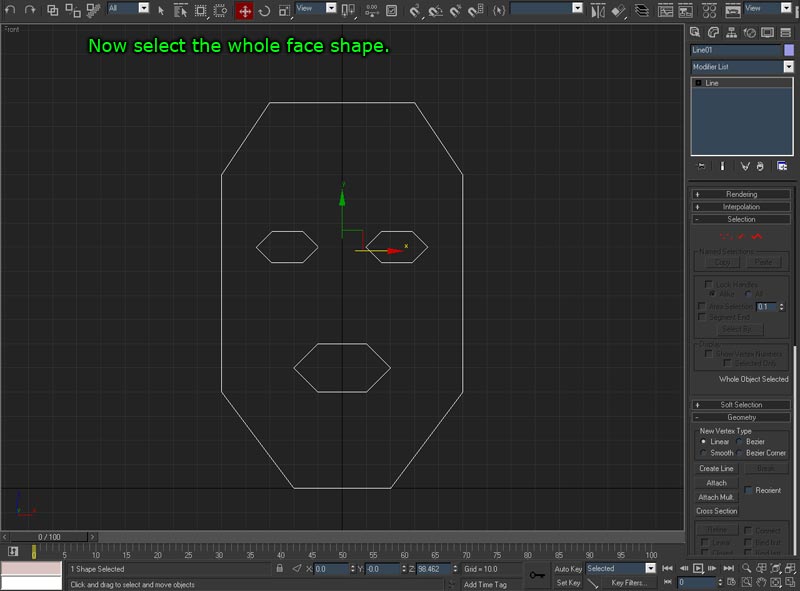
| We need to convert it to an object now, from lines. This will allow it to have a renderable skin, or mesh surface. You can render lines also, in the lines modifier panel select the rendering drop down and choose rendering options, it will allow you to render lines as tubes. |
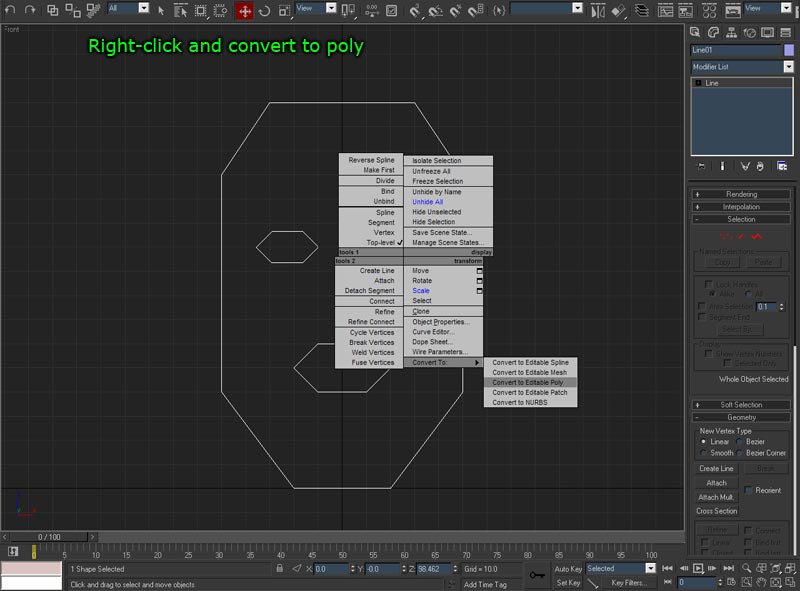
| The last operation created a surface, but the way the polygons of the surface are connected has been automatically decided. It did not really pick a good configuration for animation. So we need to cut the polygons differently so they will bend in certain areas better. |
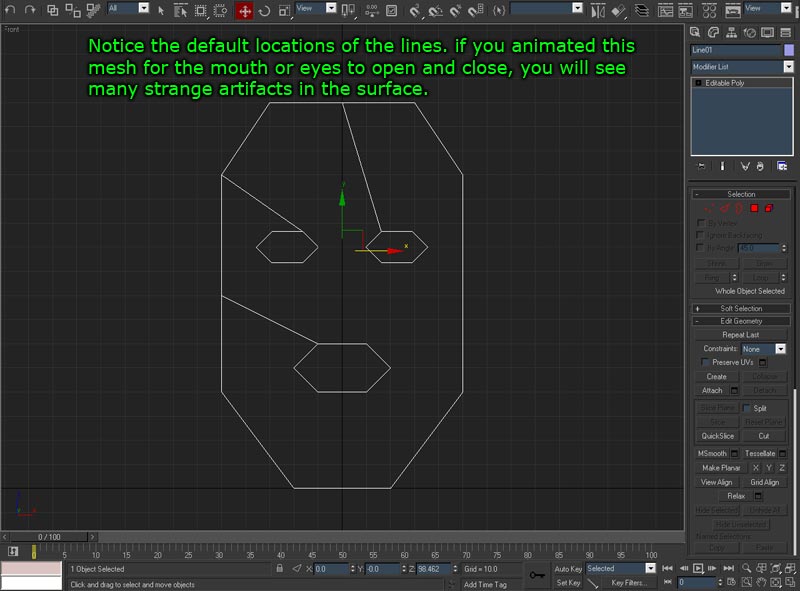
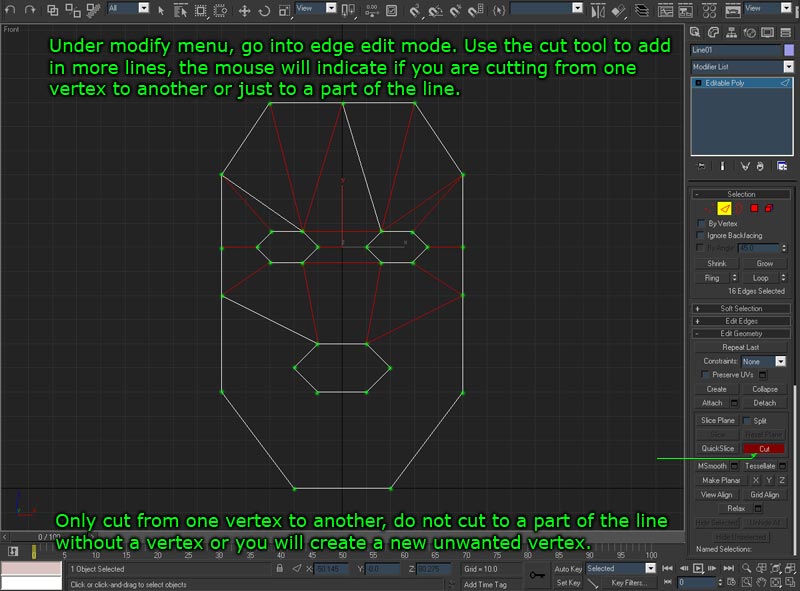
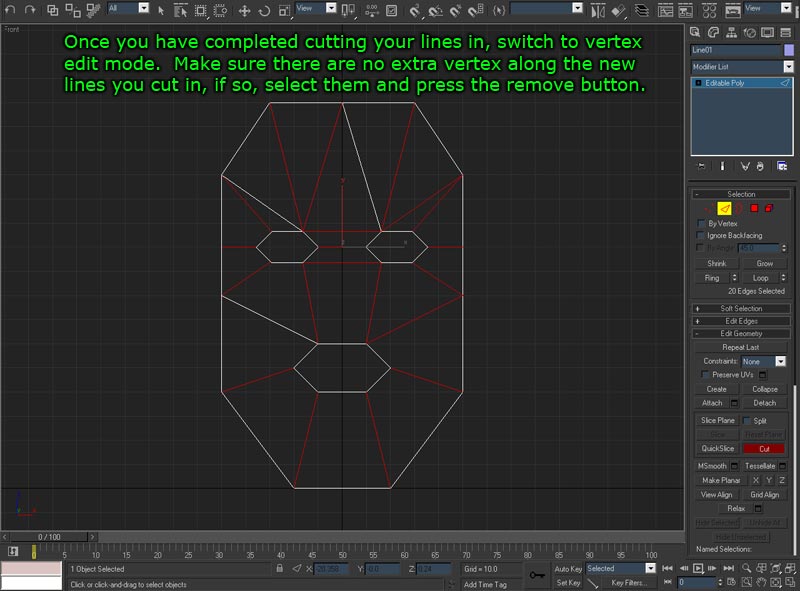
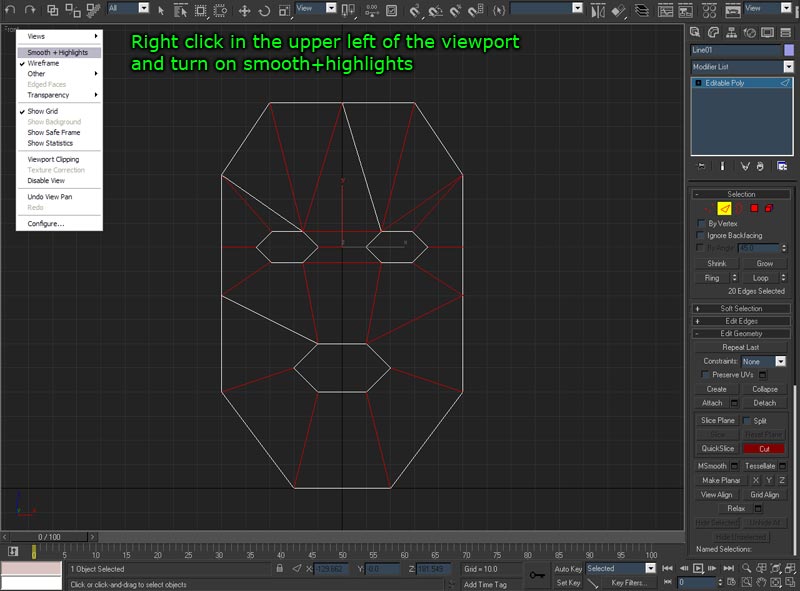
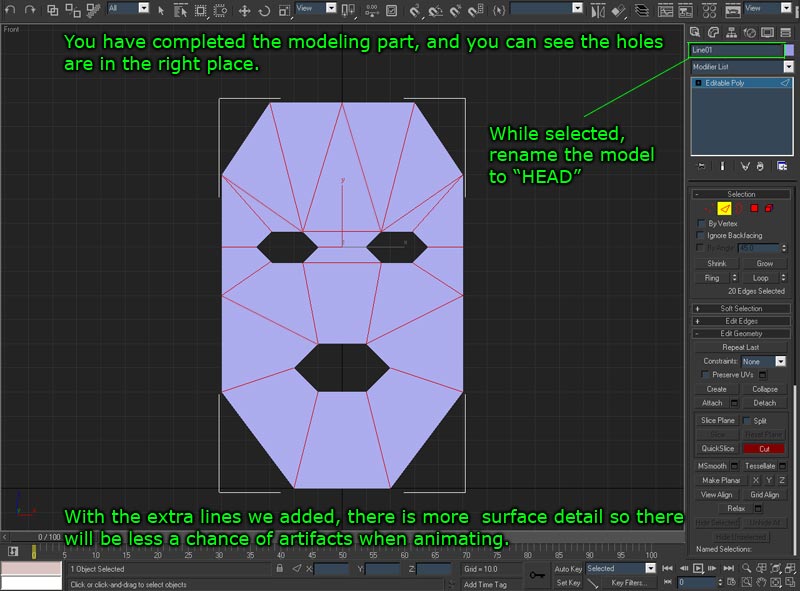
At this point, you are finished with the basic head model!! I know, this is super basic and completely unrealistic, but it could still be used for an interesting 2D character that is rendered in 3D. If you want to get more complex, try mapping a photograph of your face to a simple model like this and you can then animate it to do fun things. If you get to this point and see that some of your holes are not see through, you might have extra polygons laying on top of each other, try removing polygon edges and re-cutting your polygons until you fix any issues with the holes in the face. In order to use Morpher, we need to have two objects with an identical polygon count that have edges that are connected in the same way. So we just duplicate our final head model and that will ensure we have the same number of polygons, and the edges of those polygons are connected in an identical manner. |
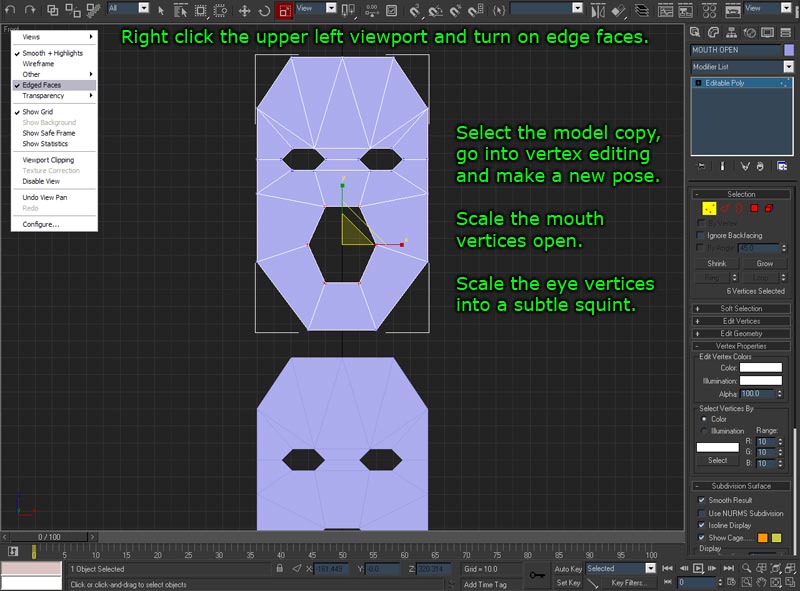
| This is where some of the fun really starts, we get to create our first expression for our face. In this case, I have made it look like a crazy scream. RAWR. You can create as many expressions as you want, but you will also have to create more sliders if you want to control them with that method. |
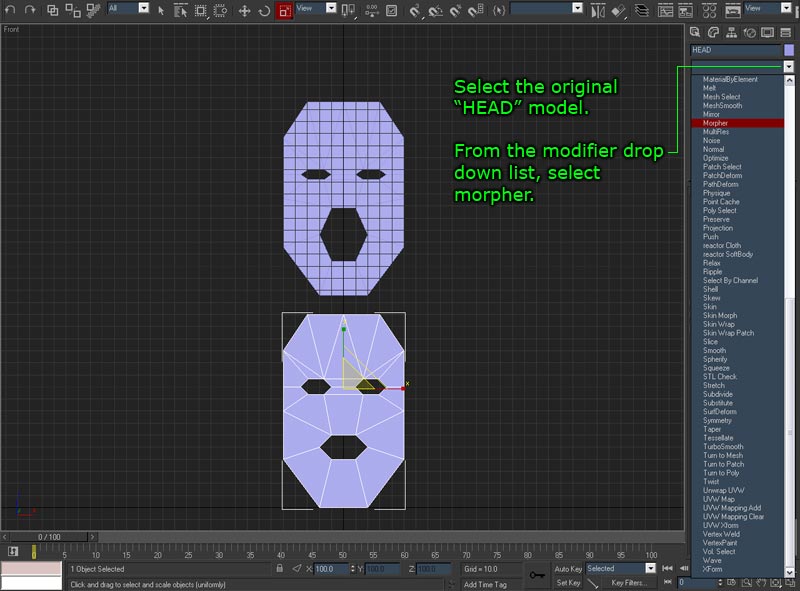
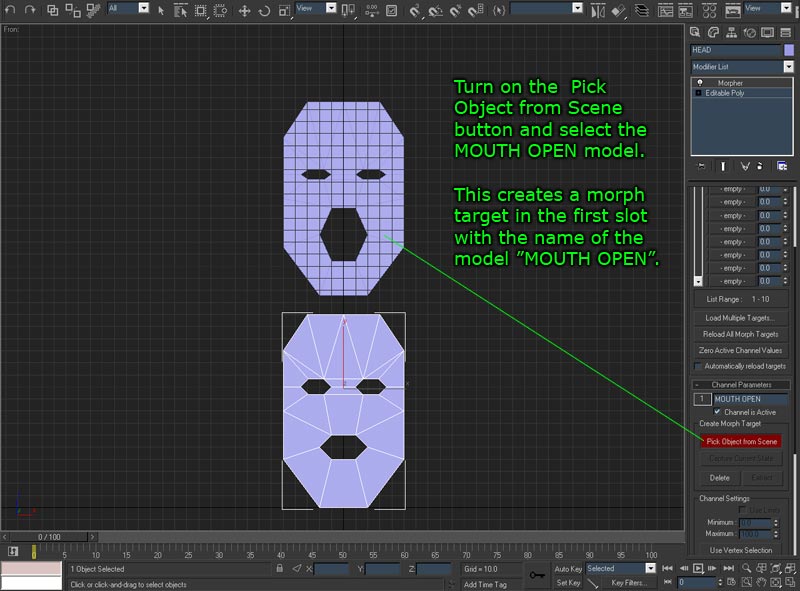
| We are now done with Morpher, and our head expression model. The model of the screaming face is now stored in the Morpher modifier, and you can delete the model, or you can just hide it. If your working on a complex head in the future, you might not want to delete your reference expression models if you spend a lot of time on them. You can also just save a new file and delete the references to speed up loading and working times which for complex models can be a big issue. |
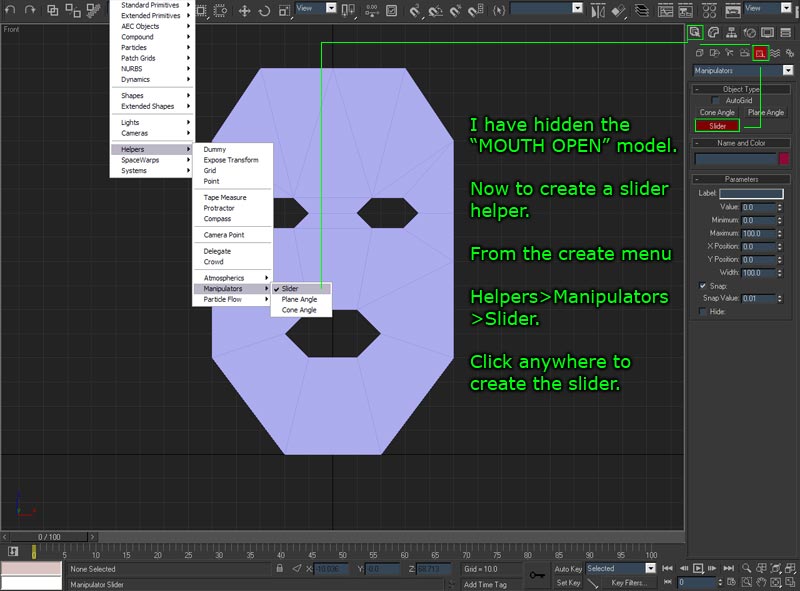
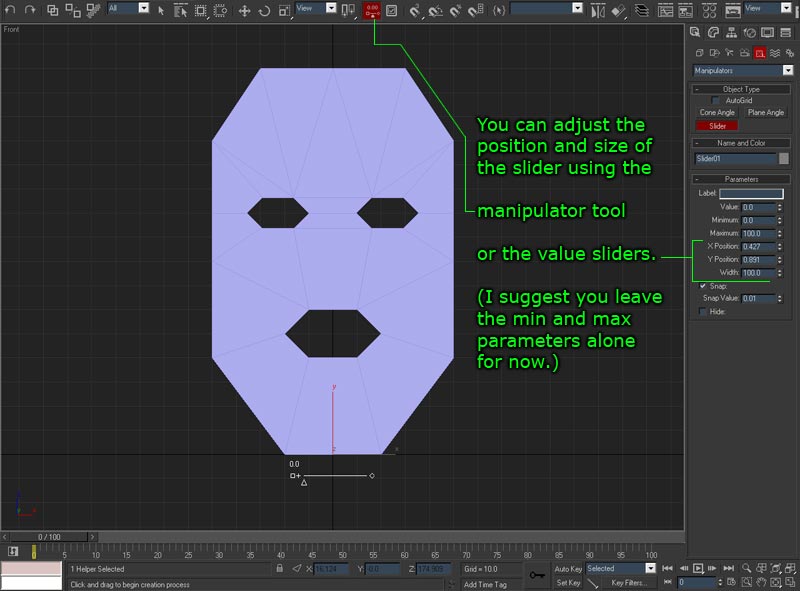
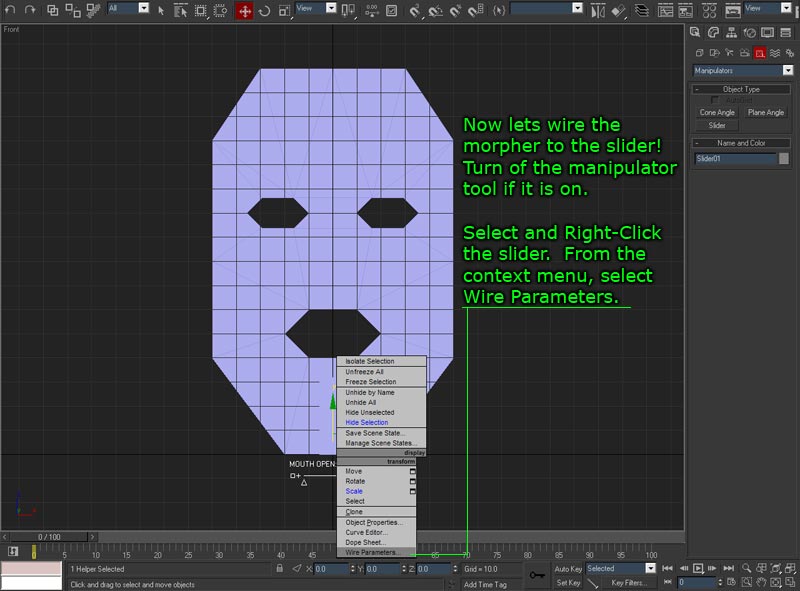
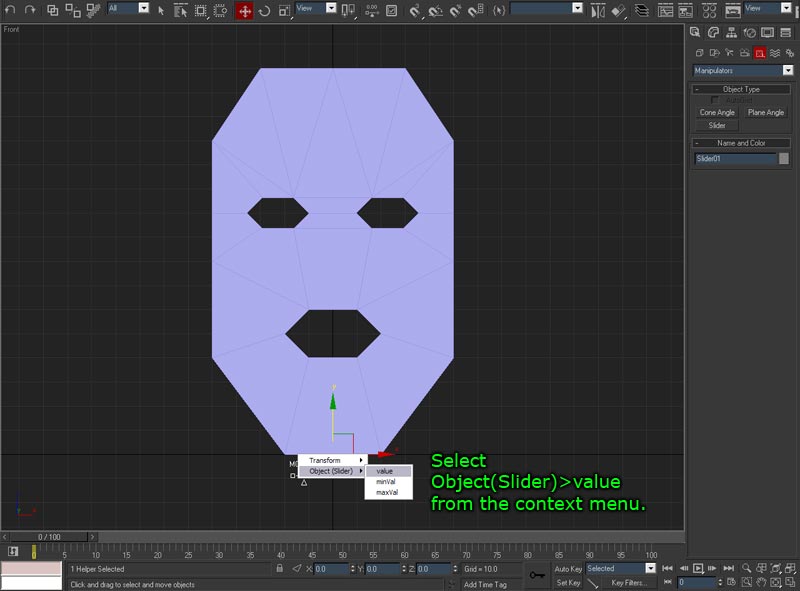
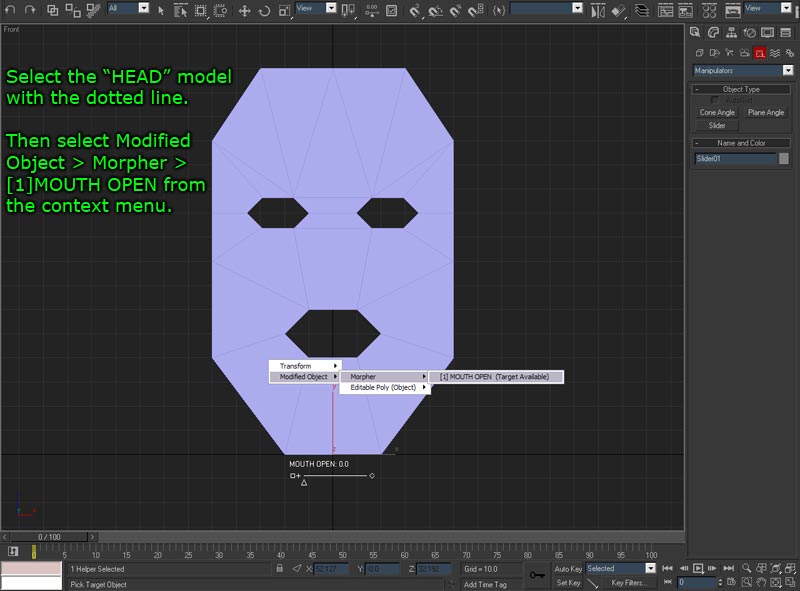

| Now that your done it is time to animate away with that slider, you can even drive your mouth slider with sound files! Also, you remember that if you create multiple expressions and load them into Morpher, you can have a single slider driving multiple Morpher channels at the same time by connecting them in the parameter wiring dialogue. |

| Share this page with your friends if you like it! |
|
return to www.themindforest.com
© 2007 -
Jonah Shafer, All Rights Reserved.
( privacy policy )